


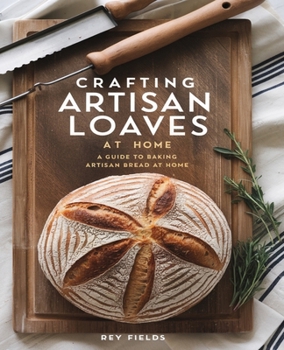
Crafting Artisan Loaves at Home: An In-Depth Journey to Elevate Your Bread Baking Skills and Techniques
No Customer Reviews

Making homemade bread is one of those timeless skills that seems to bring people together. I remember the first time I tried my hand at baking bread; it was a rainy Saturday afternoon, and the smell of yeast and flour filled my kitchen. The process was a delightful mix of science and art, and even though my first loaf turned out a bit dense, the experience was incredibly rewarding. To master the craft of homemade bread making, you really need to embrace the journey. Here's a step-by-step guide that I've honed over the years, filled with personal tips and a few delightful mishaps along the way. **Step 1: Gather Your Ingredients**
The basics are simple: flour, water, yeast, and salt. I often use bread flour for its higher protein content, which helps create that lovely chewy texture in artisan loaves. Don't shy away from experimenting with different types of flour, like whole wheat or rye. Each adds its own unique flavor. **Step 2: Activate the Yeast**
If you're using active dry yeast, you'll want to dissolve it in warm water. I learned the hard way that water that's too hot can kill the yeast, resulting in a sad, flat loaf. A good rule of thumb is to aim for water that feels warm to the touch, like a cozy bath. **Step 3: Mix and Knead**
Combine your ingredients in a large bowl. I usually start with a wooden spoon and then switch to my hands. Kneading is a workout, and I've found it's a great way to relieve stress. Aim for about ten minutes of kneading until the dough is smooth and elastic. If you're feeling adventurous, you can even try the stretch-and-fold method, which I've found gives a lovely open crumb structure. **Step 4: First Rise**
Place your dough in a lightly oiled bowl, cover it with a damp cloth, and let it rise in a warm spot. This is where the magic happens I often place mine near a sunny window. After about an hour, it should double in size. **Step 5: Shape the Loaf**
Once your dough has risen, gently deflate it and shape it into a loaf. This part can be a bit tricky, but practice makes perfect. I once made a loaf that looked more like a flat pancake than a traditional shape, but it still tasted delicious **Step 6: Second Rise**
After shaping, let your loaf rise again. This time, I like to sprinkle some flour on top for a rustic look. **Step 7: Preheat the Oven**
While your loaf is rising, preheat your oven to a high temperature, usually around four hundred fifty degrees Fahrenheit. If you have a baking stone or a Dutch oven, preheat that too. It helps create a crispy crust, which is my absolute favorite part of homemade bread. **Step 8: Bake**
Once your oven is hot and your loaf has risen, it's time to bake I often score the top with a sharp knife to allow for expansion. Bake until golden brown, and the loaf sounds hollow when tapped on the bottom. **Step 9: Cool and Enjoy**
Let your bread cool on a wire rack. The anticipation is always the hardest part There's nothing quite like slicing into a warm loaf, slathering it with butter, and enjoying the fruits of your labor. In my opinion, the beauty of homemade bread lies not just in the taste, but in the process itself. Each loaf tells a story, whether it's a triumph or a lesson learned. So, roll up your sleeves, get your hands a little messy, and enjoy the journey of baking bread at home. You might just find it becomes a beloved ritual in your life, as it has in mine.
The basics are simple: flour, water, yeast, and salt. I often use bread flour for its higher protein content, which helps create that lovely chewy texture in artisan loaves. Don't shy away from experimenting with different types of flour, like whole wheat or rye. Each adds its own unique flavor. **Step 2: Activate the Yeast**
If you're using active dry yeast, you'll want to dissolve it in warm water. I learned the hard way that water that's too hot can kill the yeast, resulting in a sad, flat loaf. A good rule of thumb is to aim for water that feels warm to the touch, like a cozy bath. **Step 3: Mix and Knead**
Combine your ingredients in a large bowl. I usually start with a wooden spoon and then switch to my hands. Kneading is a workout, and I've found it's a great way to relieve stress. Aim for about ten minutes of kneading until the dough is smooth and elastic. If you're feeling adventurous, you can even try the stretch-and-fold method, which I've found gives a lovely open crumb structure. **Step 4: First Rise**
Place your dough in a lightly oiled bowl, cover it with a damp cloth, and let it rise in a warm spot. This is where the magic happens I often place mine near a sunny window. After about an hour, it should double in size. **Step 5: Shape the Loaf**
Once your dough has risen, gently deflate it and shape it into a loaf. This part can be a bit tricky, but practice makes perfect. I once made a loaf that looked more like a flat pancake than a traditional shape, but it still tasted delicious **Step 6: Second Rise**
After shaping, let your loaf rise again. This time, I like to sprinkle some flour on top for a rustic look. **Step 7: Preheat the Oven**
While your loaf is rising, preheat your oven to a high temperature, usually around four hundred fifty degrees Fahrenheit. If you have a baking stone or a Dutch oven, preheat that too. It helps create a crispy crust, which is my absolute favorite part of homemade bread. **Step 8: Bake**
Once your oven is hot and your loaf has risen, it's time to bake I often score the top with a sharp knife to allow for expansion. Bake until golden brown, and the loaf sounds hollow when tapped on the bottom. **Step 9: Cool and Enjoy**
Let your bread cool on a wire rack. The anticipation is always the hardest part There's nothing quite like slicing into a warm loaf, slathering it with butter, and enjoying the fruits of your labor. In my opinion, the beauty of homemade bread lies not just in the taste, but in the process itself. Each loaf tells a story, whether it's a triumph or a lesson learned. So, roll up your sleeves, get your hands a little messy, and enjoy the journey of baking bread at home. You might just find it becomes a beloved ritual in your life, as it has in mine.
Format:Paperback
Language:English
ISBN:B0DQY7NW2T
ISBN13:9798303696495
Release Date:December 2024
Publisher:Independently Published
Length:342 Pages
Weight:1.30 lbs.
Dimensions:0.7" x 7.5" x 9.3"
Customer Reviews
0 rating
Copyright © 2026 Thriftbooks.com
Terms of Use | Privacy Policy | Do Not Sell/Share My Personal Information | Cookie Policy | Cookie Preferences | Accessibility Statement
ThriftBooks ® and the ThriftBooks ® logo are registered trademarks of Thrift Books Global, LLC
ThriftBooks ® and the ThriftBooks ® logo are registered trademarks of Thrift Books Global, LLC